
Software Manuals
Download PDFForceSeatDI
Low-level SDK that controls Motion Systems platforms directly - no ForceSeatPM required. Reference for multi-platform and Linux setups.
1 General information
1.1 Introduction
ForceSeatDI (Direct Interface) is a lower level interface than ForceSeatMI. It controls hardware directly and ForceSeatPM is not required at all. All error handling and status checking have to be performed by the application. This interface allows to control more than one motion platform from the same PC and allows to create complex but fully synchronized movements of multiple motion platforms.
1.2 ForceSeatMI vs ForceSeatDI
ForceSeatMI (Motion Interface) is a programming interface that allows to add a motion platform support to any application or a game. The ForceSeatMI does not control hardware directly - it sends all data to ForceSeatPM. This approach delegates the responsibility of transforming telemetry data to a real motion from the application to ForceSeatPM. It means that application developers do not have to worry about things like platform disconnections, transmission errors, thermal protection warnings or signal filtering.Direct Interface is less complex than ForceSeatMI. It manages hardware directly, thus ForceSeatPM is not essential. Checking errors or status is a duty of the application. It allows to control multiple platforms from the same computer. Thanks to such a solution it is possible to build complex and fully synchronized movements of multiple motion platforms at once.
Warning
ForceSeatDI should be used only in very specific applications. For all other applications,
ForceSeatMI is recommended.
1.3 Features comparison
| ForceSeatMI | ForceSeatDI | |
|---|---|---|
| C/C++ | ✓ | ✓ |
| C# | ✓ | ✓ |
| Python | ✓ | ✓ |
| Unity 3D | ✓ (only Windows PC target platform) | ✓ (only Windows PC target platform) |
| Unreal Engine | ✓ (only Windows PC target platform) | ✓ (only Windows PC target platform) |
| Matlab®/Simulink® | ✓ | ✓ |
| Microsoft Windows | ✓ | ✓ |
| Linux (Ubuntu 16.04.3 LTS Desktop x64) | − | ✓ |
| Raspberry Pi 3 (armv7l 4.9.35)) | − | ✓ |
| Raspberry Pi 4 64-bit (armv72 6.1.5)) | − | ✓ |
| Gear VR platforms (e.g. Oculus Go, Samsung Gear VR) | − | − |
| Multiple platforms from single PC over USB | ✓ (same data sent to all platforms) | ✓ (separated control of each platform) |
| Multiple platforms from single PC over Ethernet | − | ✓ |
| Easy error handling | ✓ (by ForceSeatPM) | − (by the application) |
| Diagnostic features | ✓ (by ForceSeatPM) | − (by the application) |
| Requires ForceSeatPM | ✓ | − |
| Telemetry mode & scripting engine | ✓ | − |
| Motion profile selection by the user | ✓ | − |
| Inverse kinematics | ✓ | ✓ |
| Fordward kinematics | ✓ | ✓ |
| Motion compensation for VR | ✓ (by VR HeadWay in ForceSeatPM) | − (by the application, e.g. camera position correction) |
| Licensing | per motion platform (license stored on PC) | per motion platform (license stored on motion controller) |
1.4 Documentation
Idea behind ForceSeatDI and its API structure is similar to ForceSeatMI and at this moment is it not described separately in any document. Please refer to ForceSeatMI documentation to get better understanding how the motion platform control works and examine examples delivered in ForceSeatDI SDK archive to see implementation details.Warning
ForceSeatDI should be used only in very specific applications. For all other applications,
ForceSeatMI is recommended.
2 How to activate the license
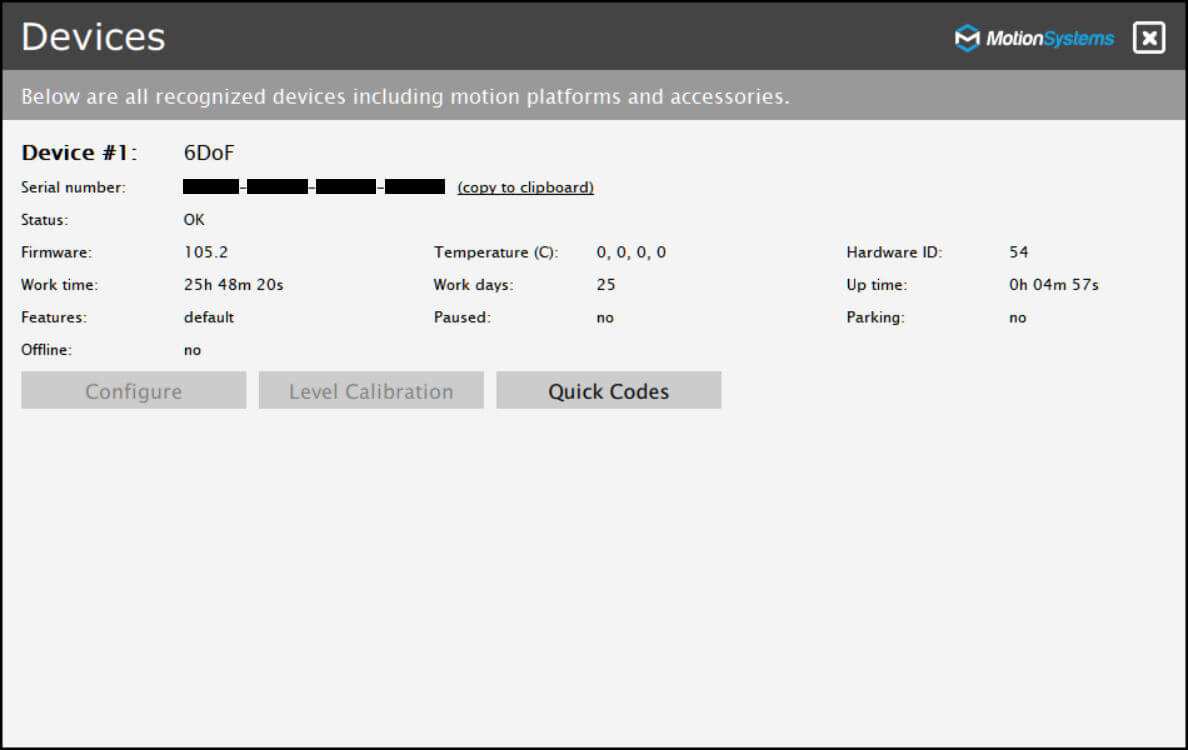
ForceSeatDI license is kept in the motion controller so the activation process is different than for ForceSeatMI. Once you receive the activation code do following steps:- Install ForceSeatPM
- Open ForceSeatPM main window
- Click Tools and Diagnostic and then Devices
- Click Quick Codes
- Enter the activation code. The verification might take a while.
- Once finish, close the Quick Codes window.
- Turn off the device
- Turn on the device
- In Devices window you should see FSDI displayed in Features field
3 Cross compiling for Raspberry Pi
3.1 Introduction
This short tutorial shows the idea of using VisualGDB to build one of our examples for Raspberry Pi. This section does not describe the full tool chain and build system configuration, it only indicates a few important key points that should help you to configure your project:- preprocessor directives
- copying.so file to destination board
- debugging the program as root.
Tip
VisualGDB is not mandatory for ForceSeatDI to work on Raspberry Pi. You can compile ForceSeatDI using any other build system.
3.2 New project
Start Visual Studio and create a new Linux Project. Make sure to create it in the directory without spaces in the name, e.g. C:\ForceSeatDI


- ForceSeatDI.h
- ForceSeatDI_Defines.h
- ForceSeatDI_Functions.h
- ForceSeatDI_Loader.c
- ForceSeatDI_Structs.cs
3.3 Project configuration
Open the project Properties.


Warning
If the application is not executed as root, it will not be able to detach the USB
device from the kernel and connect to the motion platform.

Type: $(TargetDir)/ForceSeatDI32.so into Target path.
3.4 Build and run
Rebuild the project.
